AFTERTHOUGHT HEEL TUTORIAL
Pattern example: Star-Edged Socks by Anna Maliszewski
"Oh The Woe!" Sock Knitter Scenarios For Favoring Afterthought Heels:
SCENARIO 1: your trudging through your cable/lace work. You're really hooked on that pattern...cause you're finally getting it down-pat. And after a good 4-6 inches of leg work, you're like, "oh man, now I have to set aside the pattern, knit a 2.5'' heel, turn the heel, deal with picking up stitches on the sides, and working the gusset decreases before I can f-i-n-a-l-l-y get back to the pattern, figure out where I left off (or where I set the pattern and cable needles down at), and try to get into the cable groove? Woe is me!
SCENARIO 2: You're at the movies, or somewhere away from home, and you're knitting your sock in stockinette because you don't have to look down too much, and you finally make it to the heel. Are you honestly telling me that you can fiddle with the heel steps in the dark? If you can, can I please borrow you're super-powers?
SCENARIO 3: You like being unconventional! Oh, snap!
A tutorial on how to do the Afterthought Heel:Special note: I realize that in Part 1, my work is inside-out in the photos. When I knit with dpns, I usually like to knit this way because it's easier on my hands, even though it's non-conventional. Not all of the photos are setup this way.
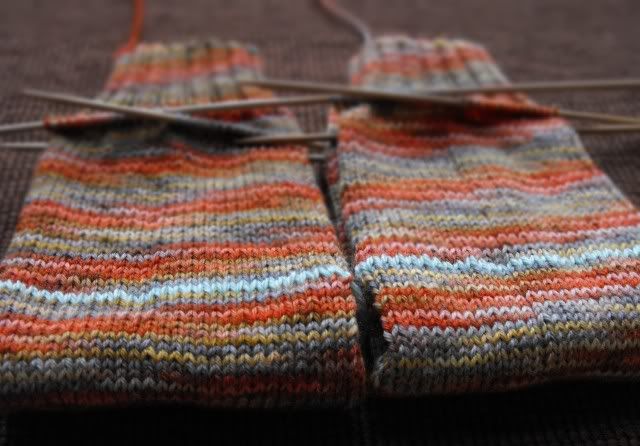
Part 1: the set-upStep 1: knit up to the point where you would place your heel. A heel traditionally uses 50% of your total stitches. Depending on the sock pattern instructions, you may knit half the round with your working yarn before you knit the heel stitches with waste yarn, or you may be asked to begin the heel round with the waste yarn right off the bat. Jeez, manners!
Note: the stitches are distributed as thus, whether or not you choose to use 3dpns, or 4 dpns for your sock: 50% of sock stitches= front (I usually use just 1 dpn for this) and 50% of sock stitches for the heel (I split these into two dpns, 25% of stitches on each).
However, for the sake of simplicity, I start my heel right off the bat on the first 50% of my stitches (ex: 32sts) in the round, although it makes no difference if you choose otherwise.
Step 2: You'll need about 20'' of waste yarn in a contrasting color for each sock (with the same thickness, or a tiny bit thicker yarn than your sock yarn). Drop the main working yarn and knit the specified heel stitch amount with waste yarn.
Step 3: After knitting the specified heel stitches, drop the waste yarn, pick up the main working yarn again and continuing working on your current sock pattern in pattern.
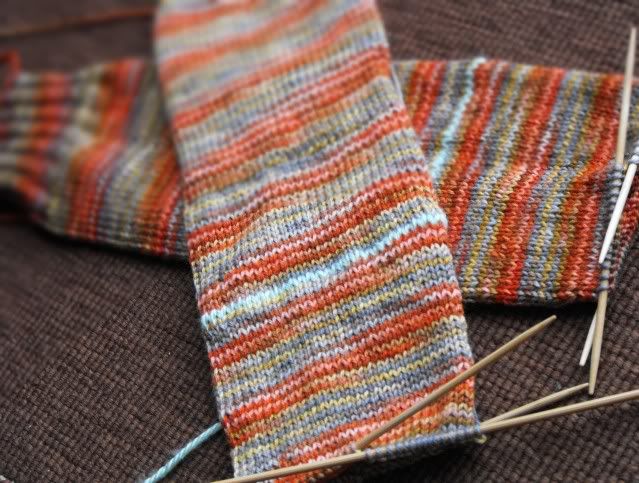
Step 4: Upon the following round, you will knit over the waste yarn and will forget all about the heel until after the completion of the sock, so continue on with your merry knitting way, doing whatever you need to do until you have decreased the toes and grafted the remaining toe stitches together. Try to snicker a little bit like you "went around the system" and are doing something scandalous. It's more fun.Note: when you are supposed to knit a certain amount of inches before the toe shaping, measure from the waste yarn line.
Part 2: Releasing the "live stitches"
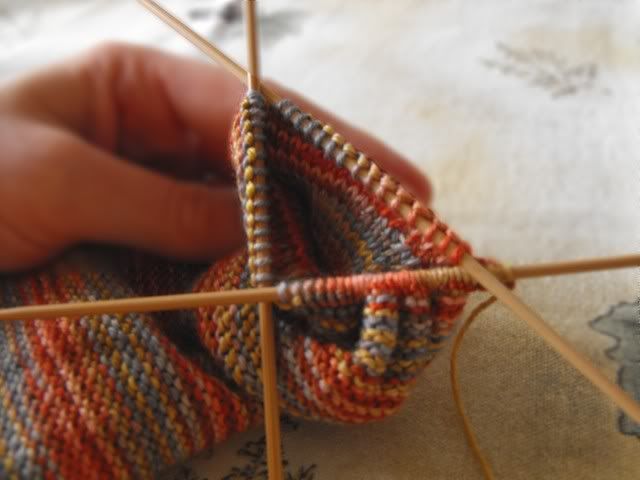
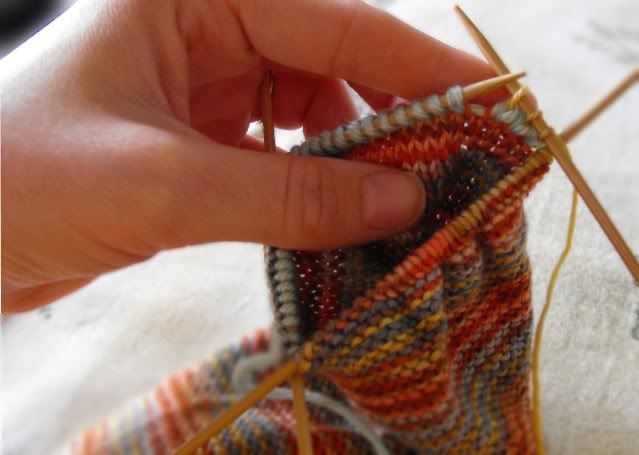
Step 1: It's time to unravel those saved stitches, now that you're done knitting the rest of the sock. whether or not your strand is hanging out on the "right side" of your work, or some how found it's way hanging out on the "wrong side," pull at the first part of the stitch on the right side of the sock, and pull the waste yarn strand out to release a stitch (actually, two stitches total per waste yarn stitch--refer to Step 2). The bottom stitch is being released in the photo below.
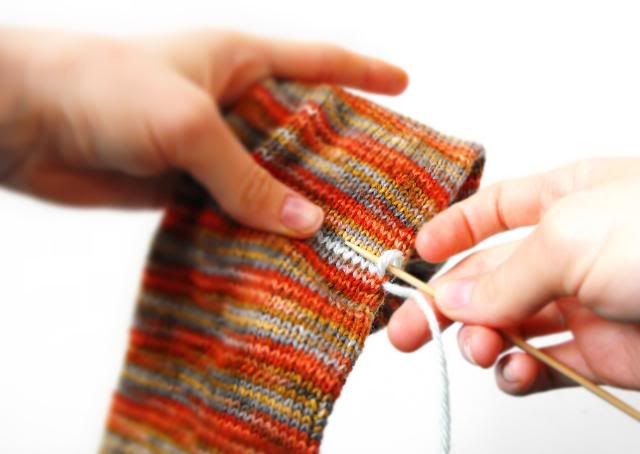 |
| Figure 1 |
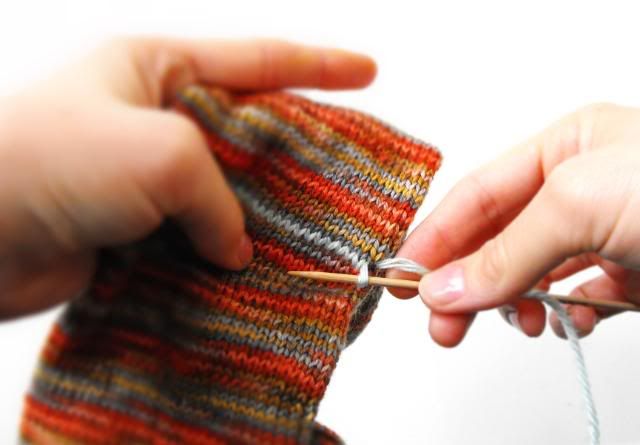 |
| Figure 2 |
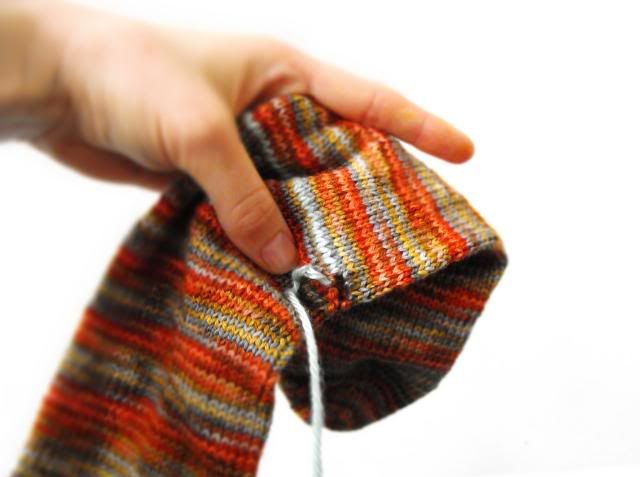 |
| Figure 3 |
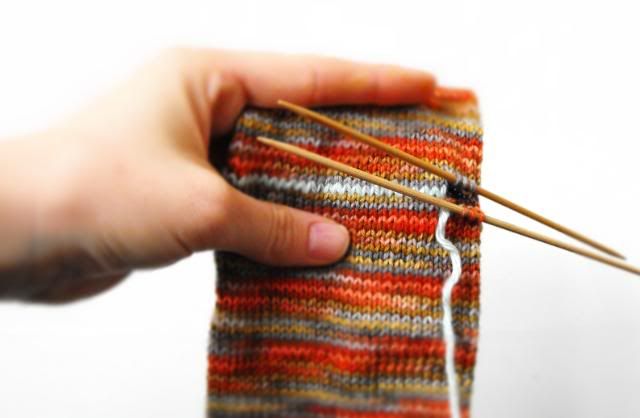 |
| Figure 4 |
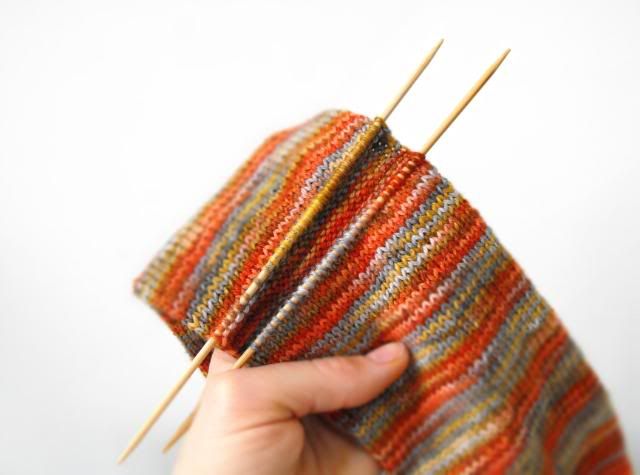 |
| Figure 5 |
Part 3: Working the heel decreases
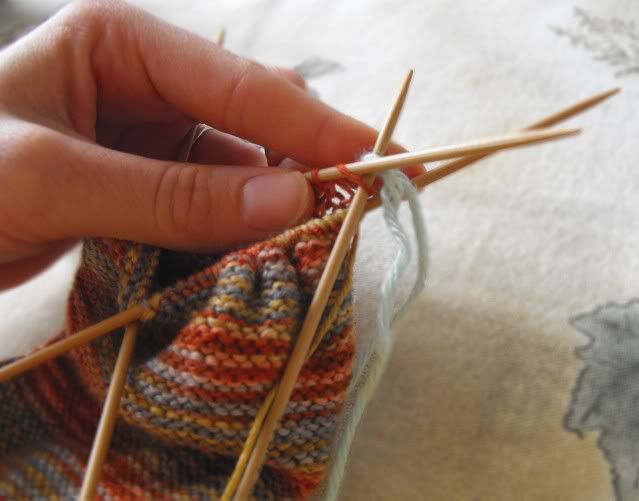
Step 1: Divide your heel stitches evenly among 3 or 4 dpns, depending on your preference (both needle preferences will have instructions for heel decreases.)
3 NEEDLES: This requires a 50%-25%-25% stitch distribution among your needles, and uses a "stitch marker." If you prefer to work only with 3 dpns, arrange your needles so that the heel has two needles (25% each of those total stitches) and the top part of the heel has one needle containing 50% of the total heel stitches, or simple all the stitches originally on it, with a marker in between half of the stitches. Example: If working with a "32st heel," the bottom dpns get 16 each, and the top needle has 32 sts total, but needs a marker after stitch 16.
Needle Numbers: The bottom left needle is needle #1, the top left needle is #2, and the bottom right needle is #3.
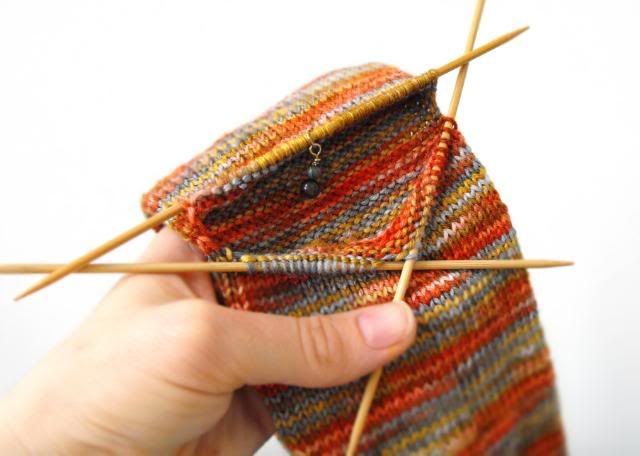 |
| Figure 6 |
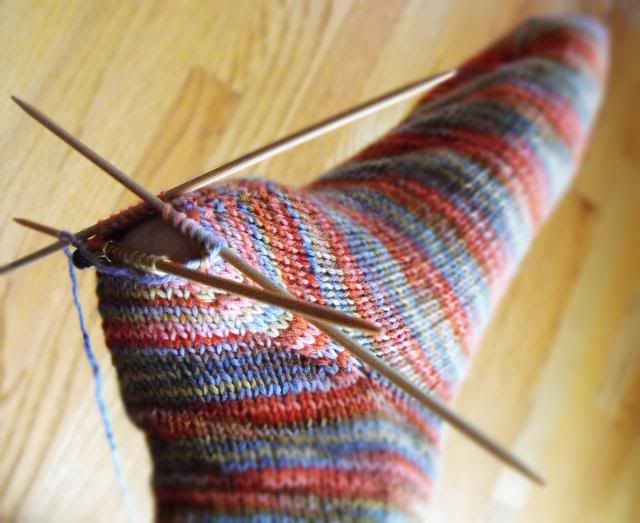
4 NEEDLES: divide your stitches up completely. Each needle will have 25% each of the total heel stitches. This means that you will just slide half from both the top & bottom of the heel parts on two two different needles. Use a saftey pin or place marker to indicate needle #1: between the two bottom stitches (where my thumb is).
Needle Numbers: The bottom left needle is needle #1, the top left needle is #2, the top right needle is #3 and the bottom right needle is #4.
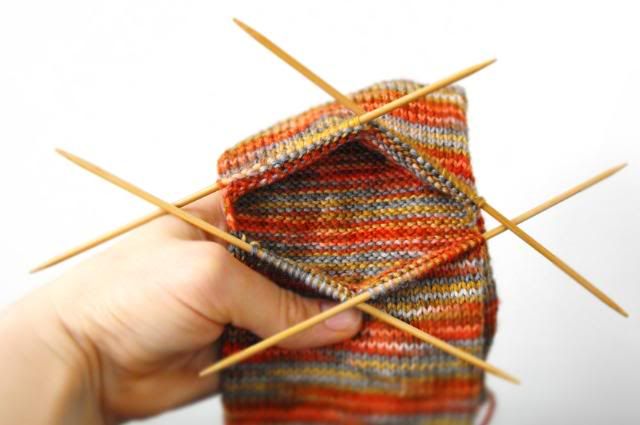 |
| Figure 7 |
Step 2 (for all dpn methods): Attach the yarn before Needle 1, and work the decrease rounds until you have 5 sts left, or 20 stitches total. End with one last knit round.
For 3 needles:
Rd 1: All needles: knit straight.
Rd 2: Needle 1: knit to last 3sts; k2tog, k1. Needle 2: k1, sl1, k1, psso, knit to the last 3sts; k2tog, k1. Needle 3: K1, sl1, k1, psso, knit to the end.
For 4 needles:
Rd 1: All needles: knit straight.
Rd 2: Needle 1: knit to last 3sts; k2tog, k1. Needle 2: k1, sl1, k1, psso, knit to the end. Needle 3: knit to the last 3sts; k2tog, k1. Needle 4: K1, sl1, k1, psso, knit to the end.
Trouble-shooting:
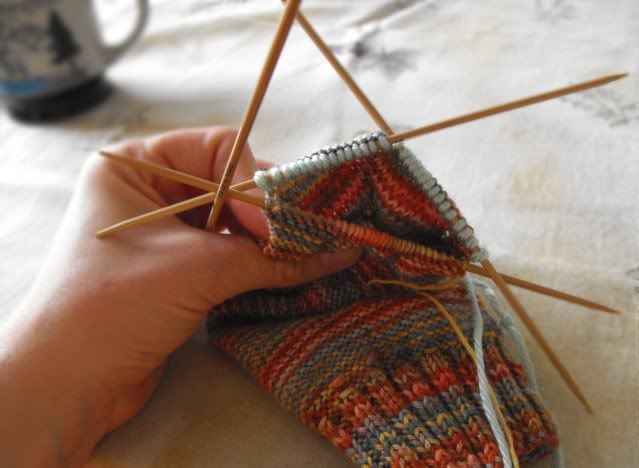
Closing the gap between the needles: I will use the 4 dpn method example. Refer to figure 7. To avoid big gaping holes at sides of the heel decreases, knit the last stitch of needle 1 with a stitch made in the gap between needles 1 and 2, and ssk a stitch made in the gap between needles 3 and 4 with the first stitch from Needle 4.
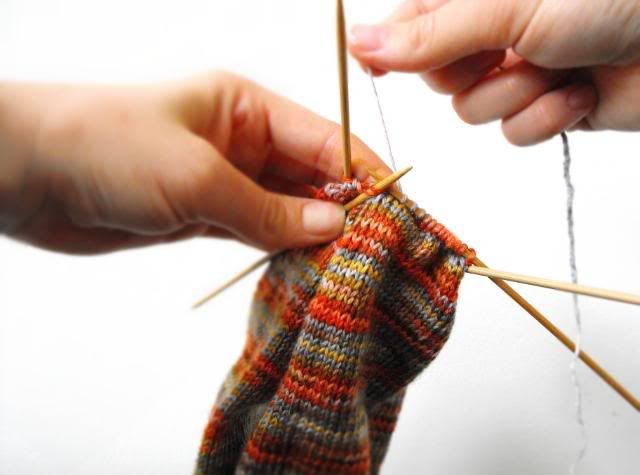 |
| Figure 8 |
Feeling a bit snug? Try on your sock before completing all of the decreases. It's good to do this when you only have several more increases left. If you fear that your heel will not fit, you can slow down the decrease process a bit by adding one more "knit straight" round before the last few decreases. Example: *knit 2 rounds straight, then do a decrease round.* I recommend that you keep trying on the sock though, if you do this. You might not need to slow down the decrease process that much!
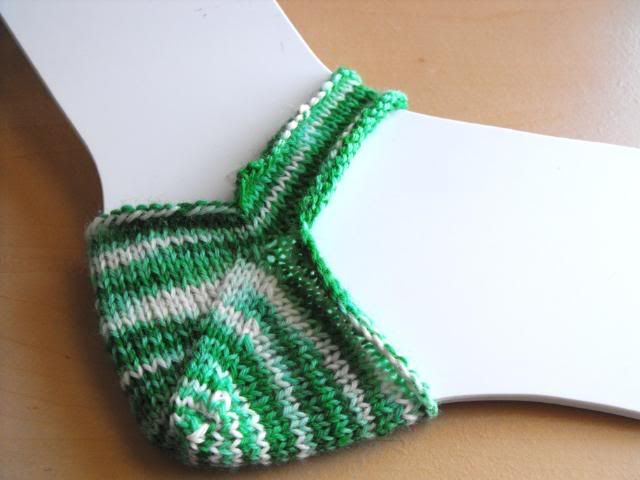
And voila! You have a beautiful heel that looks just like the "Basic Toe Decrease." Notice how it goes great with variegated yarns? Neat, huh? The variegated green heel swatch was from my "Irish Spring" colorway. It makes me want to knit up another pair of these socks now.
I bid you good knits! Have fun knitting up Afterthought Heels! I hope this tutorial helps you out!
Check out my pattern "Star-Edged Socks" to make a pair for yourself.

25 comments:
Thank you so much for this info. I'm just knitting my very first pair of socks and I appreciate all the help and advise I can get.
That colorway is GORGEOUS! I really like it! This post makes me motivated to knit socks...it's my goal this year to learn...
thank you, thank you, thank you !!!
i have a million half done socks laying about because i have a heel phobia. now i can at least finish (sort of) the socks, and being so close to actually finishing them might just be the thing to help me. i forgot about afterthoughts...and i remember trying it one on one of my early early socks and getting annoyed.and it's laying there half done as well.
Thanks - this is a great tutorial!
Howdy! I am finally at the end of the heel...I assume I kitchener the heel together, right?
That's correct! :)
How clever! I just finished the first sock of my FIRST toe-up socks, and will try this on the 2nd sock, just for snicks :)
cheers!
Wonderful - no problem adapting it to two circular needles and the big advantage is that you don't loose the sequence of the colorway when using self-stiping yarn. It always bugged me that the stripes always looked "off" over the instep.
this is a great idea. I knit the standard sock pattern and will definitely give this a try.
Absolutely amazing, thanks you so much and congrats!!
Thank you thank you thank you!!!
This was so easy to follow, and it looks so much better too! I will never go back to the old way!
Thank you for the wonderful article ... should save me lots of time on my next sock pattern and looks much more appealing - imo.
Great tutorial for DPNs. However from past experience I have DPN phobia. I am in the process of making my very first sock (toe up) using the Magic Loop method. Any chance you'd consider doing this tutorial for either Magic Loop or 2 circs? I, and I'm sure many others would very much appreciate it. You do such a nice job of explaining each step so clearly. Hoping you'll say yes.
Thank you! This is a wonderfully clear tutorial. However, I have DPN phobia and am knitting my very first sock by Magic Loop. Can this method be adapted to Magic Loop or 2 circs? Could you perhaps do a tutorial with that method? To just "think it through in my head" is 'way beyond my sock knitting expertise. If it would be too much trouble that's ok. Doesn't hurt to ask, right? Thanks for this great tutorial anyway.
Such a good tutorial. There isn't any question left about the Afterthought Heel. :)
Annie S--
I'm sure this method can be adapted because you just use waste yarn and keep on knitting. However, for the tuts on those...I'm not as specialized in those methods, so I wouldn't really make one until I'm good at those. (There are still some things I'm new at since I get too used to doing only one way.)
Thank you so much for this tutorial! I have had a pair of socks almost finished for 6 months but was afraid to pick up the stitches where I had placed my waste yarn for the afterthought heel. With your tutorial it was smooth and easy! I did one heel last night and the other tonight. Thanks!
So could you do this with another color? does the heel "wear out" since there is not the traditional K1sl back?
I'm not sure about how much more this would wear. I suppose it wouldn't be that much worse off...it really is dependent on how tight you knit and with what yarn you use. Yarn can wear differently depending on fiber blend.
As for the color question, I'm not sure if you requested that I knit up another example in a different color (which I can't right now since my life is tied up from my twin babies) or if you can use different colored waste yarn (which of course is a yes).
This past year was the first time I used the afterthought heel. I made two stockings for my gransons. turned out very well. will be using in the future.
Have been struggling to do a short row heel and having no success - 3 tear outs so far! After reading your tutorial, I'm going to happily go back to the Afterthought Heel which I have done before. I thought "I SHOULD learn another way to do a heel, the afterthought is just too easy". NO WAY! You helped me realize that it is just one of the ways - not judged less than other heels - and I can do the afterthought without guilt. LS
BRILLIANT. I couldn't get anyone to help me because my grandson picked a stocking pattern online. Sooooo I hadn't purchased the pattern, or yarn at their store. How small. Thank you all!!!
I've been looking for a clear tutorial for this, mainly so I can fly through socks! Yours is the best & has been bookmarked :-)
I'm Laurpud on Ravelry
When knitting toe up when should I put in the waste yarn? should I allow 2 inches to add to the foot length once the afterthought heel is complete?
What does the abbreviation “psso” mean in your instructions?
Post a Comment