Showing posts with label Slippers. Show all posts

Monday, January 28, 2019

FO: French Press Slippers

Yarn: 2 balls of Paton's Classic Wool in the color teal--double or triple stranded
Needles: US 15
Started: Jan 24, 2019  Completed: Jan 25, 2019
The easy portion is knitting the parts. (The hard part is the felting.) I timed knitting the "top" of the slipper, and each one took me roughly 25 minutes. The bottom is more like 30ish minutes. It seems like this whole thing should take an hour of knitting from looking at the photo.
To a first time felter, it might look as though you totally messed up with your gauge, since it's almost twice the length of the final product. They look like slippers for clown feet, and the stitches are messy looking on size 15 needles because the stitches need to be loose enough to felt properly. 
I placed the slippers in the front-loading washing machine with some towels, and it did felt the slippers some, but I found that I still had to do the majority of the felting by hand. (And it's hard on my hands.) I had to open the window in 0 degree F because it is a workout. Felting by hand takes about an hour of dedication to get it "just right." I always end with something really cool, but always say to myself, "no more felting for a long while."

The first version I knit was my MIL's French Press Slippers from December 2016, so it's been long overdue that I knit myself a pair. 

I love the idea of writing a message in puffy paint on the bottom of the slipper (instead of just doing no-slip squiggles) if you are gifting these slippers to someone. The other slipper actually said "do not machine wash" on the bottom.
 Teal is one of my favorite colors aside from sea-green, aqua and lavender.

In hind-sight, I would knit 2 extra sts for the "top" of the slipper pieces. For both set of slippers, it felted so much and sits much too low when you wear it. The heel has always been tricky too. I still have to figure out how to get it not to pucker out. One slipper heel ends up fitting better than the other heel, and I can't figure out how to sew the heel to better stay on the heel.

Upcoming post: "Hermione's Everyday Socks" using Noro yarn

Wednesday, November 07, 2018

FO: Sunday Slippers

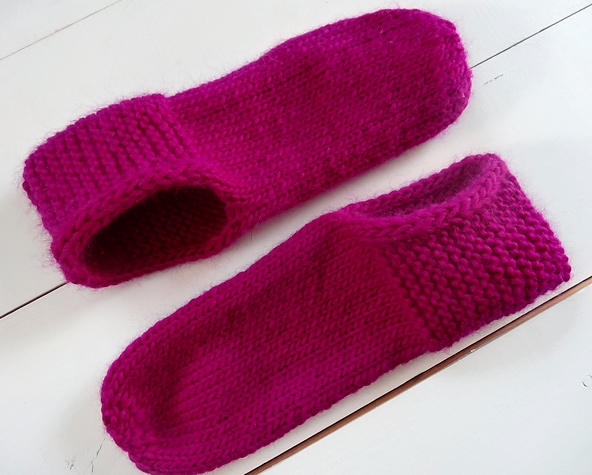
This was a super-quick project that was completed within 2 days. They are warm, cozy, and do not slip off your feet (well, at least with my modification). I adapted the pattern to have an I-Cord edging to not only help it keep it's shape (and stay on), but it looks really sharp!
Honestly, if you look at the original and this pair...you'll see why the I-cord edge stands out! Garter stitch needs a tidy edge if it's a garment.
Project: Sunday Slippers by Cleo Malone
Needles: US8 (5mm)
Yarn: Stitch Nation by Debbie Stoller Full O' Sheep in the color "Passionfruit"
Notes: I was given the “60 Quick Knits For Beginner” book to review. I decided one of the best ways to review a book was to knit from it, and show it off!
Modifications: I-cord edge--on the side you need an I-cord edge, sl 3 sts and purl those same 3 sts on the following rd. 
I will most definately be knitting more of these in the future. The make great house slippers/socks and gifts when you are in a pinch!

Monday, December 26, 2016

FO: French Press Slippers

Here's another Christmas gift that I knit very late in the game. This pattern has been on my queue for several years. I'm ashamed to admit that I was too cheap to purchase the $7 pattern, and I finally had to pinch myself a little bit and just pay for it, because these are beyond cute and make great gifts.

Pattern: French Press Slippers by Melynda Bernardi
Yarn: Paton's Classic Worsted Weight Wool
Needles: US 15
Size: 7/8
Started: 12/17/16
Completed: 12/18/16

If you knit these, make sure to label them similar to mine. They curl up and are hard to tell apart.

The knitting process is super quick. You can whip up both slippers in a day. It's the seaming and the felting process that is the most time-consuming. I haven't felted anything before in my high efficient top-loader machine, and I was having trouble getting it to agitate enough to felt, so I ended up doing them by hand. Yowzers.

You'll want to apply some paint (I used "puffy paint") if you don't sew suede to the bottom so that it can grip the floor. If you are already writing/drawing something, you might as well write some instructions?
I found the same large buttons as the pattern's at JoAnn Fabrics. This slipper benefits from a nice large button on the side.
I knit these for my MIL, who wears the same size shoes as me, and so it was easier to feel good passing them off since they fit me.

I have bought teal yarn and the same buttons for my own pair. I think I will make it in the beginning of the new year. For now, I have to make Joe's Antler Hat for his birthday January 5th.

Thursday, November 28, 2013

Little Elf Slippers

The Christmas season is upon us.
It's time for cinnamon cookies and hot cocoa, prancing reindeer, snowflakes and jolly "Ho Ho Ho's!"

My little guys needed something woolly to keep their chilly tooties from going frigid while keeping with the spirit of the Holidays.

What's better than felted Elf slippers for Santa's Little Helpers?

Jake loves hugging his brother, by the way. This photo is unbelievably priceless. :)


Project: Felted Slippers by Midnattsol 
Yarn: Paton's Classic Wool, 1 skein of "Leaf Green" & "Plum Heather"
1 skein of each color will make two complete "toddler slippers"
Needles: size US10 straights

Click HERE to see my pattern modification notes and helpful hints. 

The boys loved slipping these on themselves and strutting around like the good little Santa's Helpers that they are.

I did have to bribe them with little M&M candies to stand still long enough for these shots!

It's imperative to use some sort of glue or suede fabric on the bottom of the slippers because felted slippers are very slippery on smooth surfaces. I did little fancy "Ho Ho Ho's" and wavy scribbles on mine. It will take a couple of days to completely air-dry.
Now on to elf ears? 

Have a very happy Thanksgiving Day from our family to yours!
Sincerely,
Anna

Monday, November 18, 2013

Little Felted Slippers pt.1 (tips & tricks)

With a little trial and error, I'm happy to report that my two little "Elfish" felted slippers are completed and drying at this current moment. The key to working with any origami-like project is preparation and good thinking-outside-the-box skills. Although I had preparation checked off my list with a drawn-out chart of how it's sewn up, let's face the facts: when you fold an object, it is hard to decipher the chart the more you sew.

To reiterate my point, let me tell you a true short-story:
Once upon a time there was a knitter who hated to hand-seam. For this project, however, she felt the need to do tidy sewing, meticulously making sure that the seams were invisible. Things were going smoothly, until the last section needed to be seamed. The slipper looked, well, a little odd. While one side looked perfectly fine, the other seamed "off." Frustrated, the knitter turned the knitting inside out to rip back a couple of seams, but was perplexed at how she couldn't find the weaved-in tail ends. She looked, and looked, and looked, but it was nearly impossible to decipher which ends were knit together and which were seamed. Well, with a little picking around at the back, and many minutes passing by, she finally ripped the seams out and started over. This was one example where invisible seaming back-fired!

Project: Felted Slippers by Midnattsol 
Yarn: Paton's Classic Wool, 1 skein of "Leaf Green" & "Plum Heather"
1 skein of each color will make two complete "toddler slippers"
Needles: size US10 straights

Pattern modifications to make a size "Toddler"
***Elfish style*** 
Version 1: Main slipper color: Red    Cuff: Green  
(Version 2: Main slipper color: Green    Cuff: Red)
For version 1, the bottom blocks 1 and 7 will be green, and the rest of the blocks are red.

Toddler Size:  Co 12 stitches; work 24 rows for each square. Leave long tails while switching colors to be used for seaming.
CO with green, work 24 rows. Switch to red and work 120 rows (or 60 ridges). Pick up 12 sts with red for blocks 7 and 8; knit 24 rows each.

This order isn't crucial, but here's some tips I've learned on Ravely for this project:  1.) Seam C 1st.   2.) Seam B   3.) Seam A.   4.) Lay flat with lower left flap still in left hand. Fold up and match F to F and then G to G. Sew them both.  5.) Seam D.   6.) Seam E.

If you are planning on working on these felted slippers in the future, here are some tips that I learned from my mistakes:

1. Draw or print up the chart to the slippers, complete with markings "A," "B," "C," and so on, along with any notes you might need if you are working with a lot of different colors, like: what colors each square will be, or even what square is what part of the foot anatomy (ankle, top of foot, heel, etc.). Next, take markers out and color code where the seams are going to be joined.

2. Now do yourself a HUGE favor, and take this little extra step to ensure that when you start folding up this project to sew, you can still recognize the seaming areas "A," "B," "C," etc by threading different colored yarns into those seaming sections. It would be best if they were the same colors as your chart, but it's not a big deal. In the end, all you have to think is "blue is sewed to blue, green to green, white to white, etc."

3. Keep in mind which side of the project you are sewing. Keep the "right-sides" out and facing you.

4. Make sure all of your seams are neat and pretty (despite my little story in the beginning). When it felts, you'll want there to be nice crisp, clean lines.

 For the cases where one side of the garter touches the top edge of garter (that sounds confusing, check out figure 2), do a combination of threading the yarn through the side bump of the garter edge (the same way you sew garter edges together) while picking up a loop (see figure 1) between the garter ridge and cast-off/cast-on edge for the other one.
figure 1
figure 2


This is how the slipper looks, pre-felted:
Jake testing the slipper out.
5. Felting: an awesome, yet sometimes tricky endeavor. Make sure you knot up your tail ends after seaming extremely well. Unless you want to be like me, who had to do some emergency seaming mid-felting when the machine took a couple of seams completely out. And I weaved in the ends very well.
The machine is only an aid. I eventually took out the slippers and hand-felted to get it thicker and more solid. You don't want any garter showing through.

Tips on felting:
-To felt, the fiber must be 100% natural, like 100% wool. NO blends.
-The water must be hot.
-Agitating the wool (or rubbing the wool together) in this hot water will cause it to frizz and shrink into felt.
-The project must be knit a little loosely to felt well.
-I think it's a general rule that a felted project will felt to about 1/3 the size of the original knit. 
-Drying it in the dryer will cause it to shrink some more, so be careful about how much you shrink it in the washer AND dryer.

The key to machine-felting is: BABYSITTING your project. Check it often. For me, it was a seam-ripping issue, but you'll want to make sure it doesn't shrink too far.

NOTE: unless you want to learn the hard way from the "Yarn Harlot," who let her projects drain and spin in the machine thus leading to an expensive repair bill when the hairs caught inside the machine, DON'T let your water drain until you remove the stray hairs from the washer. I used mini strainer (the size of the top of a mug). Only then should you let the water drain.

Just roll the wet pieces in a towel to drain as much water out.


6. Drying. Dry it a little in the dyer if you'd like. It's not absolutely necessary if you use a towel to get the excess water out, but it takes a LONG time to dry if you don't do this. Keep babysitting it though. It doesn't need to be completely dry. It might be better to leave it a little damp so that you can mold it into its final shape and leave it to set like that.

Check out pt.2, the finished projects tomorrow! Happy felting!

Tuesday, September 25, 2007

Lightning-Fast Slippers (KUAS Original Pattern)

Designed by Anna Peck-Maliszewski

This free pattern has been removed 10/17/12. It may or may not return, but if it does, it will be tweaked and pdf’ed and available for an inexpensive $1.99 price.


Materials:
Needles: Size 13 US --Straight Needles Size 11 DPNS (pack of 4)
Darning Needle
Crochet Hook: just to pick up stitches. (I used “ I ”)
Fabric: Any Kind—Just keep in mind that different colors & stripes will show more than pictures! For slippers without lining, use fleece or silk (silk needs 1 ½ inch cut strips)

Shown in shoe size 8 (US)

Gauge:
1’’ wide cut strips (using the “Maze Method”) & size 13’s : 3 sts= 1’’ 3 rows= 1’’

"Maze Method" Note: Keep cutting around edges of the fabric, maintaining a 1'' width. You should NOT have have to tie any edges, because it should all be one continuous strip of fabric. The corner edges will stick out a little bit, but don't fret too much about that. When you knit it up, the edges get tucked in. After you have finished cutting, roll the fabric into a ball.

Thursday, May 03, 2007

Lightning-Quick Slippers: knitting w/ fabric

Ever just want to knit with something other than just yarn? Well, I was intrigued by the idea of knitting with fabric. Let's look at the positives, shall we? First, you can use large needles. My 1'' wide strips let me use 13's easily, probably even 15's or more (if your stitches don't need to be tight at all). Then, there's the possibility of making rugs, which actually motivated me to knit with fabric in the first place. You can even use el-cheapo yarn, you know the kind that's a dollar a yard at Walmart. Even so, you can use old material the wouldn't normally look that great as a skirt a decade later, one that was lurking in the coldest, darkest conrners of your basement...
However, there is one negative aspect: the coarseness on your hands. Now, this can easily be remedies. There's fleece, silk, and...*cough* more expensive fabric.


With all due respect, I present my first design & experiment with eccentric knits:

Lightening-Fast Slippers
Designed by Anna Peck
[RAVEL-IT!]


Don't be fooled by the blah-ness of the picture. You can see patches of the blue & white stripes among the offwhite patches.

Now the mystery is over, right? Nope.
I still have to buy more fabric and make a rug!

Next Frontier: Knitting with wire!