Guys, this raglan is one of my absolute favorite FO's ever. Period.
It is warm, squishy and has an appealing diamond texture in a captivating heathered green colorway. The V-shaped collar has faux buttonholes, and you can't go wrong with a long-sleeved raglan construction. Plus, let's talk about green clothing...you can sport it for so many occasions, espeically St. Patty's day, Halloween AND Christmas!
(If I were Emeril Lagasse, I'd say "BAM!")
This was another project that I chipped away last August while at a family reunion near Galena, Il. Here's a little journey into my WIP stages:
That feeling, when you finally try it on and it fits perfectly!
I had to re-knit one of the sleeves due to an error on my part, so after I knit what was three sleeves, it was so satisfying throwing it in the wash.
Aw. The photo above was taken in what was my newly renovated bathroom at our last house, several months before moving. I miss those counters and mirrors...
As soon as it gets chilly this will be coming back on me!
As I began writing this next installment of "make-up posts," my kids finished their first day of e-learning at a new school district, and the quiet that once enveloped the house earlier could no longer be found, as they instantaneously became a bucket of energy. Yikes.
Anyhow...how are you? What have you been up to? Staying sane? Staying healthy?
I am continuing my journey of learning Italian. I started after the new year, then took a break around when we moved in the spring, then started learning more, then took a short break, and now it's about fall...it's time to get serious again! (I actually like being "the student.")
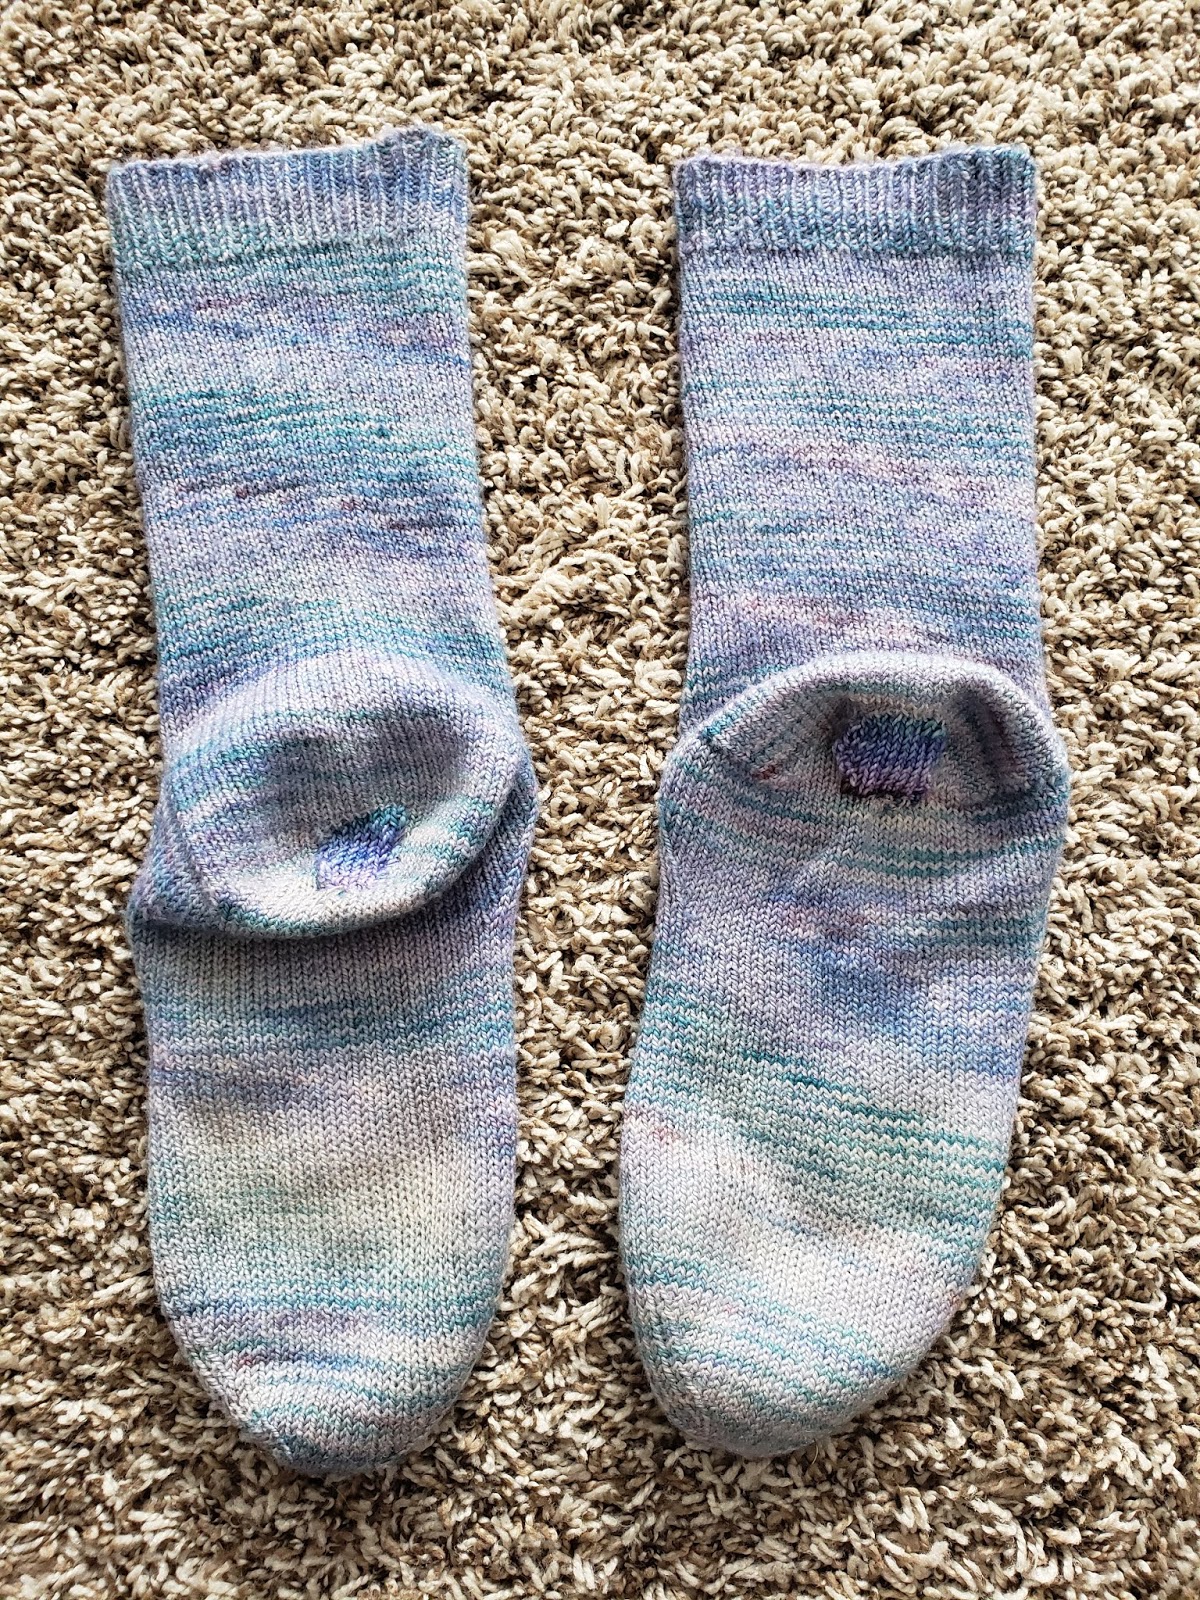
So, what's off the needle (as of a year ago?--eek): Rainbow Socks!
They are so pretty and cheerful. I specifically knit these during the warm months only. That means that I took two summers to knit each of the sock mates, and that was ok with me as I had other socks that I worked on too.
Since I've been slacking on "WIP" posts, let me take you through the entire journey:
These next photos were me taking this to two separate family reunion trips. The photo above was taken at a cabin surrounded by rolling farmland in Elizabeth, IL, near Galena, IL. The photo below was from a beach on Lake Michigan.
Fun stuff! These reek of summer! The funny thing is that they are too warm to wear during the summer months, lol.
Stay tuned for me upcoming make-up posts. I've got three more FOs, and a bunch of WIPS.
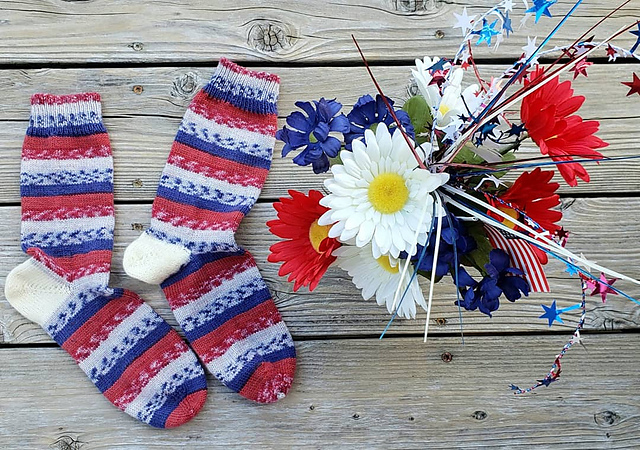
What's more festive than holiday socks? 🙌 These socks are red, white and blue...plus have a stranded colorwork motif! Did I do any of that labor? Nope!
When Cascade came out with this Independence "Heritage Prints," I knew they had to be 4th of July socks! I called them "American Socks" on my project page, but they can be French socks too. :)
Knitting this wild rabbit was fun. Claire Garland has other realistic looking knit animals that I look forward to tackling soon, specifically the a deer/fawn and cat.
I found these animal eyes at Hobby Lobby, which makes the rabbit look even more realistic.
It was really neat witnessing the clever construction of the animal while knitting it. Claire Garland really has created something special because she has an eye for detail.
I added whiskers using flexible beading wire. It wasn't in the instructions, but I felt like he/she needed some to look complete.
A year ago I started the process of updating you on my knitting adventures, and then I seemed to have fallen off the internet. It's been so long that Blogger looks different, and I had trouble logging in! In fact, I don't even live in that house anymore, nor use that phone! Ha.
I feel it's better to be late than not here at all, so let's take a look at the Weekender sweater that I finished in March 2019.
Since I didn't bother to make a WIP post, here's a quick tour of the process:
I used a tubular cast-on/off, because it's stretchy and clean looking. I highly recommend doing this for any neckline and hem to give it a professional finish.
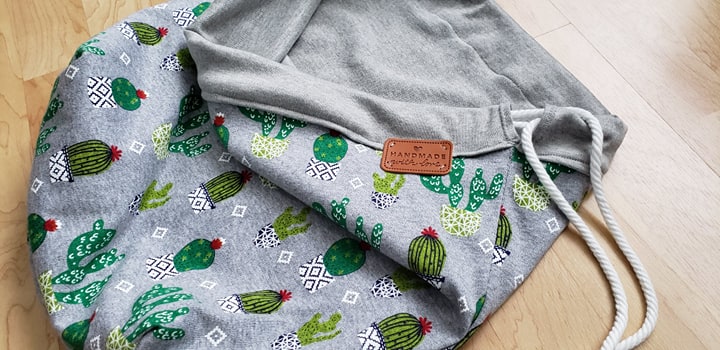
Sometimes you make something that makes you smile from the inside out. This is one of those types of projects. This is an oversized knitting project bag for large items, such as sweaters, keeping multiple projects in one bag, or for blankets, if I ever climb on the crazy wagon (I dislike knitting on heavy projects).
This oversized project bag, despite the machine attempting to eat the fabric multiple times (I had to dismantle the needle plate even), was simple to make and is exceedinly pleasing as a project bag because:
The cute cacti fabri (it just HAD to come home with me from JoAnn's)
The material is very stretchy
The material is thin and flexible for a large lined bag
Pull-string bags are just fun to open and close
I have purchased a number of faux leather tags to add to projects, but haven't used any of them until yesterday. It's hard to find an object that can use such a large tag, but this project fit the bill.
Just between you and me, the tag is actually covering up a minor sewing error (one part of the folded hem was coming loose, so I had to sew a 2 inch line under the existing line to keep it in place)--and noone can tell! It's actually a blessing in desguise that I needed something like this in this exact spot because it makes the bag look more store-bought and adorable.
I have a Weekender Sweater in there that is nearly complete and there's still about half the height space left for additional knitting or yarn.
I love it so much. I plan on using the leftover fabric to make a small project bag for socks. I might, however, have to turn it horizontally, as I don't have much left, but I feel like I can't chunk the leftover fabric from this print. It's too cute!
My husband was pretty impressed with this one. He looked at me and was like, "you really should sell these Anna!" My response was that I'm still learning to sew and I worry that there will be a flaw (like a seam not wearing well due to my novice skills), and it took me two hours, despite it being an easy project. Maybe in the future though, when I feel like all of my homemade project bags have held up well in the years.
But for now, he has volunteered me to make a backpack-style one for going to places like Six Flags.
Vamp-up your style with some sexy lace socks that would kill to be in
some black boots. They’re dying to be worn, so why don’t you get out
your stakes-er-needles and knit them up!
Valentine’s Day Sale! Grab this pattern for only $2.14 now until 2/17 at 11:59pm CT. No coupon needed.
METHOD: Top-down
MATERIALS:
Yarn: less than 400 yards of fingering weight yarn
Needles: set of 4 dpns (or one 40+’’ circular needle) in the size US 2 ½ (3 mm) and 1 darning needle
Notions: 1 stitch holder, 1 stitch marker, (Optional) 3 yards of matching ribbon (1 ½ yards per sock)
US 2.5 (3 mm) GUAGE: 32 sts and 42 rows= 4’’ in stockinette stitch
LEG MEASURMENTS: 8 ½’’ long and 3 ½’’ wide (unstretched lace)
ABBREVIATIONS:
K=knit P=purl St(s)=stitch(es) WYF=with yarn in front WYB=with yarn in back
DPN(s)=double pointed needle(s) RD=round P2tog=purl two sts together
K2TOG=knit 2 sts together P2SO= pass 2 sts over right needle YO= yarn over
SL 1= sl 1 st (purl-wise) WS=wrong side RS= right side
I knit these socks and first published this pattern for a vampire-themed KUAS yarn club back in 2008. Flash-forward to February of 2019...I realized this pattern was never added to Ravely! Whoops. So, I completely "revamped," (yes, pun intended) the pattern instructions and photos to give it a more modern KUAS Designs look.
My goal with all of my patterns is to be clear and accessible to knitters of all levels. I try to include tips, or extra details for tricker techniques/instances where I feel a novice knitter might struggle.
I write patterns in the way my 2004 self would have understood things. I like clear-cut instructions on how the sts are divided on the needles, and how you manuver them during the heel portion. I don't assume that you have knit thousands of socks. I figure that someone reading my pattern might be new to knitting and working dpns, and would benefit from this style of instructions.
These are wonderful socks for boots that rise a few inches above the ankle. Because there's only 60 sts and most of it is lace, it's a super-quick knit.
Sooner or later, our socks attempt to bite the dust. I say "attempt," because it looks really, really bad when there's holes the size of your, well, entire heel because you never thought to check the bottom decade-old handknit socks. FYI- wearing your handknit socks with "winter dry heels" is really not a good idea for preservation. (Nor does wearing worn socks with felted clogs.)
They look pitiful, and act as though they should retire to a good, quiet life in a memory box or landfill, but that's not going to happen to this pair. No sirrie. Not until the fat needles click.
Brace yourself, this is what 11 years does to a sock. This is when it was a spring chicken:
These were my Gypsy Socks that I hand-dyed back in 2008. Did you know that I used to sell yarn (back before kids)? I know...it's been forever. Here's the original blog post on the socks. They were beautiful in their hayday.
I digress: have you read Nicolas Sparks books? I haven't since maybe 2010. They are like Hallmark movie channels...once you read one or two, you've read them all. ;)
Luckily, I have a little box of leftover yarn that I've been saving for when I eventually make a Cozy Memories Blanket. I was hoping to start that after several more pairs of knit socks so I could have a wider range of colors available to use.
Look how much the colors have faded over the years. There has been a couple of accidental washing machine episodes, but those luckily hasn't felted it more than what you see.
One sock was in a more desperate state than the other. I picked up stitches according to the size of the hole. Unfortunately, these holes were right on the heel turn portion of the sock, in which you can only do so much to make the patch-work match the original shape of the heel.
Sorry, I didn't take a picture while it was in action. However, I picked up one stitch on each side every row--sometimes knitting them together with the first or last stitch and sometimes keeping the extra stitch as an increase, depending on the shape of the hole. I did not pick up the very edge of the stitch, but picked up the stitch before/after the loose stitches because the stitches around the edge of the hole are worn and frail. As "fun" as this was (please note the sarcasm), I don't want to have to re-patch in a month or two.
You can see how the inside is all felted around the hole.
All in all, it wouldn't win a ribbon at a state fair, what with it being all worn and now has an awkward square in the middle of the heel, but it does the job. Hopefully I can still get a year or two out these if I treated it more gently. Maybe buff my heel? Don't wear it in clogs and boots?
These socks have always been a little loose due to the stretchiness of the fiber content, which wears them much faster. Always knit socks to be form-fitting.
It looks good enough, and the goal was to knit a patch in a manner that mostly blends in and doesn't feel odd on the bottom of your heel. Check.
I'm curious. Have you had to patch a sock heel yet?